If you’re looking to give your high back dining chair a fresh new look, reupholstering it is a great solution. In this article, you’ll discover the step-by-step process of how to reupholster a high back dining chair. From removing the old fabric to adding the new one, you’ll learn all the tips and techniques to transform your chair into a stylish and comfortable piece of furniture. So, grab your tools and get ready to unleash your creativity in this fun and rewarding DIY project.

Understanding the Basics
When it comes to dining chairs, there are various types to choose from. Understanding the different types will help you make an informed decision about which style will best suit your needs and preferences. Some common types of dining chairs include armchairs, side chairs, and high back chairs. Armchairs have armrests on both sides, providing a comfortable and supportive option. Side chairs, on the other hand, do not have armrests and are generally more compact. Lastly, high back dining chairs are defined by their tall backrests, which add a touch of elegance and sophistication to any dining space.
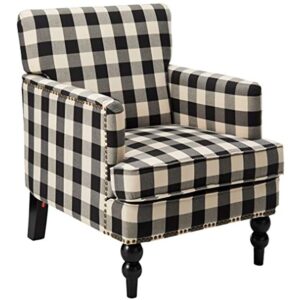
Identifying a high back dining chair is relatively easy once you know what to look for. As the name suggests, high back chairs are characterized by their tall backs, which extend above the head of the seated person. Typically, these chairs provide ample support to the upper back and shoulders, promoting good posture during a meal. The high back design is often favored for formal dining rooms, as it adds a sense of grandeur and elegance to the space.
Fundamentals of upholstery are crucial to understand before embarking on your reupholstering journey. Upholstery refers to the process of applying fabric, padding, and other materials to furniture to create a upholstered piece. When it comes to high back dining chairs, upholstery plays a vital role in not only enhancing the aesthetics but also ensuring comfort and longevity. Understanding the different techniques and materials involved in upholstery will help you achieve professional-looking results.
Tools and Materials Needed
Before you dive into the reupholstering process, it’s essential to gather all the necessary tools and materials. Having the right equipment will make the process smoother and more efficient. Some of the essential upholstery tools you’ll need include a staple gun, upholstery needles, sewing machine, pliers, and scissors. Additionally, you’ll require materials such as fabric, foam padding, webbing, and batting. It’s important to choose high-quality materials that will withstand daily use and provide comfort.
When it comes to selecting the best materials for upholstery, there are a few factors to consider. the fabric you choose should be durable, stain-resistant, and easy to maintain. Materials such as cotton, linen, and polyester blends are popular choices for dining chair upholstery. Foam padding plays a critical role in providing cushioning and support. Opt for high-density foam that will provide long-lasting comfort. Additionally, webbing and batting are crucial for ensuring the stability and structure of the chair.
Sourcing tools and materials for upholstery can be done in various ways. Local craft or fabric stores often carry the necessary supplies. Online retailers specializing in upholstery supplies also offer a wide range of options. Research different suppliers and compare prices to find the best deals. Additionally, don’t forget to check if there are any specialty upholstery shops in your area that may have unique tools or materials.
Preparing the Chair for Reupholstery
Before you can begin the reupholstering process, some preparatory steps are necessary. Preliminary cleaning procedures are essential to ensure that the chair is free of dust, dirt, and stains. Start by removing the chair from its current location and taking it to a well-ventilated area. Use a brush or vacuum cleaner to remove loose dirt and debris. For stains, consider using an appropriate upholstery cleaner and following the instructions carefully. Once the chair is clean, it’s ready for the next step.
Stripping the old upholstery is a crucial part of the process. This step involves removing the existing fabric, padding, and any other materials from the chair frame. Begin by removing any staples or tacks holding the fabric in place. Use pliers to grip and pull out the staples or tacks, being careful not to damage the frame. Once the fabric is removed, assess the condition of the padding and any foam underneath. Replace any worn-out or damaged padding to ensure your reupholstered chair is comfortable and supportive.
preparing the frame is another important step to ensure a successful reupholstery project. Inspect the chair frame for any faults or damages, such as loose joints or broken parts. Repairing a wooden frame may involve regluing loose joints or reinforcing weak areas with screws or brackets. It’s essential to address any structural issues before proceeding with the reupholstering process. Once the frame is sturdy and in good condition, you’ll have a solid foundation for your new upholstery.

Assessing and Repairing the Chair Frame
Checking the chair frame for faults is crucial to ensure a stable and durable final result. Carefully examine the frame for any cracks, splits, or loose joints. Pay attention to areas that receive the most stress, such as the seat supports and leg joints. If you discover any faults, it’s important to address them before proceeding with the reupholstering project. Reinforcing a weak frame can be done by applying wood glue to loose joints and using clamps to hold them together until the glue dries. In some cases, adding screws or brackets to reinforce the weak areas may be necessary.
Prepping the New Upholstery Material
Once you have a sturdy chair frame in place, it’s time to prepare the new upholstery material. Measuring and cutting the fabric is the first step. Start by measuring the dimensions of each section of the chair, including the seat, backrest, and any armrests. Add a few inches to each measurement to account for seam allowances and ensure a snug fit. Use scissors or a rotary cutter to cut the fabric according to the measurements, being careful to maintain straight lines and smooth edges.
Before applying the new fabric, it’s important to iron and stretch it. Ironing the fabric will remove any wrinkles or creases, ensuring a clean and professional appearance. Set your iron to the appropriate temperature for the fabric type and gently iron out any wrinkles. Stretching the fabric will help eliminate any excess slack and ensure a smooth finish. Start by draping the fabric over the chair and adjusting it to fit snugly. Use your hands to smooth out any wrinkles or folds, working from the center outwards.
Upholstering patterned fabric requires additional care and attention to detail. When working with patterns, consider the placement and alignment of the design. Take your time to position the fabric correctly to ensure a seamless and visually appealing result. Use pins or fabric weights to hold the fabric in place temporarily before securing it permanently. Take a step back and assess the pattern’s appearance from different angles before proceeding, making any necessary adjustments.
Applying the New Upholstery
Laying the fabric on the chair is the next step in the reupholstering process. Start by positioning the fabric over the chair frame, aligning it according to your desired design or pattern. Ensure that the fabric is centered and draping evenly on all sides. Gently smooth out any wrinkles or folds, working from the center outwards. Take your time during this step, as it is crucial to achieving a professional-looking finish.
Securing the fabric to the chair frame is done using a staple gun. Begin by stapling along the edges of the fabric, ensuring that it remains taut and smooth. Space the staples evenly to create a secure hold. After stapling the edges, work your way towards the center, securing the fabric in place every few inches. Continue stapling until the entire piece of fabric is attached to the chair frame. Be careful not to staple too close to the edge to avoid tearing or damaging the fabric.
Trimming excess material is an important final step in the reupholstering process. Use sharp scissors to carefully cut away any excess fabric along the edges of the chair frame. Take care to trim close to the staples without cutting into the fabric or risking any uneven edges. Removing excess fabric will result in a neat and professional appearance.
Upholstering the High Back
Upholstering a high back can present some challenges due to its size and shape. It’s important to approach this step with patience and attention to detail. To achieve a smooth and wrinkle-free application, it’s recommended to work in sections. Start at the top of the backrest and gradually work your way down. Smooth out any wrinkles or folds as you go, ensuring that the fabric remains taut and wrinkle-free. Continue stapling and trimming excess fabric until the entire high back is upholstered.
Adding finishing touches to the high back will enhance its overall appearance. Consider using decorative elements such as trimmings, buttons, or piping to add a touch of elegance and personality. These details can be attached using a glue gun or sewn onto the fabric, depending on the material and design. Take your time to position the decorative elements evenly and carefully secure them in place. The finishing touches will give your reupholstered high back chair a polished and customized look.
Adding Cushion and Support
Selecting the right cushioning is crucial for creating a comfortable dining chair. The type and thickness of the cushioning will depend on personal preference and the desired level of comfort. Common choices include foam padding, polyester fiberfill, or a combination of both. Consider the intended usage of the chair when deciding on the cushioning. A thicker cushion may be preferable for a chair that will be used for extended periods, while a thinner cushion may be more suitable for occasional use.
Adding cushion to the seat involves attaching the cushioning material to the chair frame. Start by placing the cushioning material on the seat, ensuring it is centered and covers the entire seat surface. Secure the cushioning in place using a staple gun, ensuring that it is evenly distributed and taut. Trim any excess cushioning material to maintain a clean and smooth appearance. Once the cushioning is secure, fold the fabric over the cushioning and staple it to the underside of the seat, ensuring a neat and secure attachment.
For the high back of the chair, adding cushioning will provide additional comfort and support. Measure and cut the cushioning material to fit the backrest, ensuring that it extends from the seat to the top of the high back. Secure the cushioning in place using a staple gun, ensuring that it is evenly distributed and taut. Trim any excess cushioning material to achieve a clean and smooth finish. Once the cushioning is secure, fold the fabric over the cushioning and staple it to the underside of the high back, creating a neat and secure attachment.
Final Trimming and Finishing Touches
Adding decorative elements is a great way to personalize your reupholstered high back dining chair. Consider using trimmings, such as braids, fringes, or nailhead trim, to enhance the overall look. These decorative elements can be attached using glue or sewn onto the fabric, depending on the material and design. Take your time to position the trimmings evenly and securely attach them to the fabric.
Final trimming of excess fabric is essential to achieve a polished and professional appearance. Use sharp scissors to carefully trim any remaining excess fabric along the edges. Take care not to cut too close to the staples or decorative elements, as this may damage the fabric or result in uneven edges. Removing excess fabric will give your reupholstered high back dining chair a clean and refined look.
Securing the upholstered fabric is the last step in the reupholstering process. Check that all the fabric is taut and neatly attached to the chair frame. Ensure that all staples are secure and trim any loose ends. Inspect the chair from various angles to ensure a visually appealing and well-finished result. By following these steps, you’ll have successfully reupholstered your high back dining chair and transformed it into a stylish and comfortable piece of furniture.
Conclusion
In conclusion, reupholstering a high back dining chair is a rewarding and creative project that allows you to breathe new life into your furniture. By understanding the basics of upholstery, gathering the necessary tools and materials, and properly preparing the chair for reupholstering, you can achieve professional-looking results. Assessing and repairing the chair frame, prepping the new upholstery material, and applying the new upholstery are vital steps in the process. Adding cushion and support, as well as final trimming and finishing touches, will enhance the overall comfort and aesthetics of your reupholstered high back dining chair. By taking the time and effort to reupholster your chair, you not only have the opportunity to showcase your personal style but also contribute to sustainability by giving new life to an old piece of furniture. With the newfound knowledge and skills gained from this project, you may be inspired to tackle other upholstery projects in the future.