Are ill-fitting curtains spoiling the look of your windows? Ever thought of adding a personal touch to your home decor? We’ve got you covered! Our detailed guide on “How to Hem Curtains” is all set to revolutionize your home styling journey. The art of hemming curtains is a crucial skill that empowers you to adjust your window coverings to the ideal length, offering a custom-made appearance that suits any interior design theme. Regardless of whether you’re an experienced tailor or a DIY novice, our easy-to-follow guide will assist you in mastering curtain hemming. So, what’s the hold-up? Jump in and begin crafting curtains that seem exclusively designed for your space!

Understanding Hemming Curtains
Hemming curtains is an essential part of customizing them for your window. Skilled seamstresses can easily make curtains of any material or length. Here are 6 steps to help you understand how to hem curtains:
| Step | Instructions |
|---|---|
| 1 | Measure the length of each curtain panel accurately. |
| 2 | Select a preferred hemming style: double fold, single fold, or rolled hem. |
| 3 | Securely pin the edges to stop fraying and unevenness while hemming. |
| 4 | Use an iron box to press the pinned edges. |
| 5 | Fold the pressed edges according to the chosen style and pin again if necessary. |
| 6 | Sew along the pinned edges, remove extra threads, and steam-press once more. |
When selecting needles and threads, think about the weight and texture of your curtain fabric. Also, use thread that matches your fabric color. Sharp scissors should be used to cut extra material before or after hemming, as blunt ones cause fraying.
Hemming curtains provides limitless possibilities for window decoration and a personal touch with minimal effort. Your finished curtains can suit any interior design, such as modern, rustic, or vintage-inspired.
It’s important to measure the right length for each panel, so the wearer won’t have unappealing folds when the curtains are hung.
By following these easy steps, you can turn any plain curtains into ones that look tailor-made for your space–without much prior sewing knowledge!
Gathering the Materials
To gather the materials for hemming your curtains, you need to come prepared with the right tools. Take the guesswork out of it by equipping yourself with the essentials, including a measuring tape, scissors, pins, and a sewing machine or needle and thread. In this section, we’ll introduce you to each essential tool briefly to help you get started.
Measuring Tape
This material is a must-have for any DIY project. It helps you get accurate and precise measurements. When preparing your DIY kit, make sure you include this important material.
A few things to note about it:
- It comes in different lengths and widths.
- Usually made of materials like fiberglass or steel.
- Some have metric units on one side and imperial on the other.
- Many come with a locking feature to keep measurements in place.
- Retractable types automatically go back into their housing after use.
- You can even find ones with added features like built-in levels, magnets, hooks, and laser technology.
Remember, accuracy is key. So, when selecting a measuring tape, opt for the highest quality.
Scissors
A tool is key for any crafting project that needs cutting materials. This important cutting instrument is essential for the success of creations such as clothes, jewelry, and papercrafts. A sharp edge with accuracy and precision boosts the quality of the end result.
To pick the best instrument, you have to understand what type of material you will be cutting. The blade should be strong enough to cut through thick fabric or paper and not get dull easily. The handle’s grip also matters; it must give strength, flexibility and be comfortable to hold for long periods.
If you use scissors often, it is essential they stay sharp. Blunt blades can cause frayed edges or harm the material. Keep them in good condition by only using them on designated materials and avoiding unnecessary handling which may make it dull faster.
Remember, choosing the best pair of scissors according to your needs is vital for getting desired results – whatever type of crafting or creating a project you are doing. Make sure your scissors have a comfortable grip, an easy-to-use mechanism, and a tough blade that meets your cutting needs.
Pins
Pins – a must for dressmaking and embroidery – can make or break a project. Get the right one for your fabric type and weight. Don’t just pin everywhere! Use sparingly to avoid damaging the material. Placement matters – achieve perfect lines and curves with pins. Don’t forget, quality pins are key when creating a pro-look.
Sewing Machine/Needle and Thread
For a sewing project, you need a Sewing Machine, Needle, and Thread. Here are the basics:
- Ensure the sewing machine is working properly.
- Select a needle suitable for the fabric and thread you’re using.
- Carefully thread the machine, adjusting the thread tension.
- Start sewing slowly, checking stitching quality.
- Change or refill the bobbin when needed.
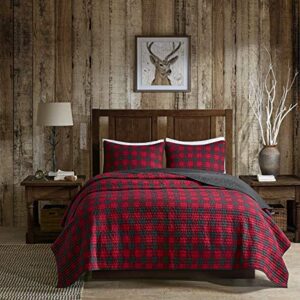
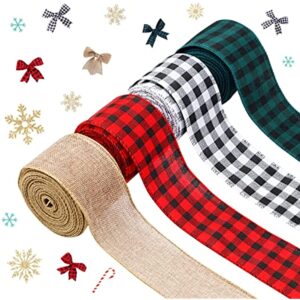
Regular maintenance is essential. Oil all moving parts and clean lint every couple of weeks. This saves time and keeps the machine in tip-top shape. However, if you prefer a simpler solution, you could Shop Curtains Now, and explore our range of Buffalo Plaid Window Treatments.
Preparing the Curtains
To prepare your curtains for hemming, you need to follow a few steps. Start with washing and ironing them to remove any wrinkles. Then, fold them neatly and pin them in place before beginning the hemming process. Following these simple sub-sections will ensure that your curtains are ready to be hemmed with precision.
Washing and Ironing
When you’ve got your desired curtains, it’s time to get them ready! Cleaning and ironing with the right methods is key. Follow these four steps:
- Check the care label on the curtains. Follow the washing instructions.
- Use a mild detergent and warm water. Gently massage, then rinse.
- Roll up the curtains with a clean towel to remove excess water. Don’t twist or wring.
- Hang the damp curtains and let them air dry before ironing. Use low or medium heat.
Storing the curtains correctly is also very important. Use hangers or fold them gently. Keep them in a cool, dry place away from the sun.
Preparing your curtains correctly will increase their looks and longevity – plus add a beautiful layer to your interior.
Folding and Pinning
For a neat and tidy hanging of draperies, it is essential to fold them up nicely and pin them in order. Here are 6 simple steps to do it:
- Put your curtains on a large, flat space.
- Fold the bottom of the cloth to meet the top. Check that edges are straight.
- Do the same for each panel if you have multiple.
- Place a pin at the top of the curtain. Make sure they’re all lined up.
- Add pins to either side of each fold, perfectly aligned with the opposite side. This will keep your folds neat.
- Attach extra pins along the length at regular spaces, to stop sagging.
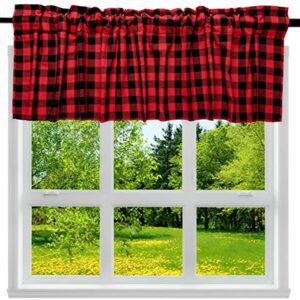
Remember: for lining material, fold in opposite directions. Always use sharp, rust-free pins to avoid fabric damage. Curtains hung nicely can make any room look great! Plus, this way they’ll stay fresh and neat for longer. But if you prefer ready-made curtains, you can Transform Your Space with stylish plaid curtains.
Curtains hung nicely can make any room look great! Plus, this way they’ll stay fresh and neat for longer.
Hemming the Curtains
To hem your curtains with ease, follow these steps for hemming the curtains that include Marking the Hem, Cutting the Fabric, Making the Hem Fold, and Sewing the Hem. These sub-sections will walk you through each step of the process, ensuring that your curtains are hemmed perfectly.
Marking the Hem
Attaining the correct length for your curtains is essential for a perfect fit! This step decides how they hang, so it’s crucial to get it right. Here’s how:
- Put a ruler at the bottom of the curtain. Then fold it to the desired length.
- Secure the folded edge with pins. Make sure everything is properly aligned.
- Using a pencil or chalk, mark little spots along the pinned edge at regular intervals.
- Remove the pins and join each mark up with a ruler and marker. This should be a straight line across the curtain.
Remember to measure each curtain individually! Uneven floors can vary in length. Also, double-check measurements before cutting any fabric! Accuracy is key when marking hems!
Cutting the Fabric
The first step to making your curtains is cutting the fabric. Measurement and precision are key for the right size. Follow these 5 steps for a perfect cut:
- Measure the window area length and width
- Add extra for hemming
- Cut with scissors or a rotary cutter
- Finish edges with zigzag stitches or invest in serger stitching
- Choose any additional design elements required.
Different fabrics have different needs when cutting. Consider thickness and texture. Practicality is key when hemming. Pay attention to fabric thickness and weight for an excellent final product.
Making the Hem Fold
Creating a Hemmed Edge to Curtains
A hem fold is a great way to get a sleek finish for curtains. It also adds weight to the bottom so they hang better. Here’s how to create one:
- Measure the fabric needed and mark it with pins or chalk.
- Iron the bottom edge and fold once towards the wrong side.
- Fold up again, tucking in raw edges. Iron again.
- Secure with pins before sewing.
- Use a straight stitch on the fold, but not both layers.
- Turn out and admire your new hems!
To make sure your hems hang straight, use clips or weights on each panel. This will give you accurate measurements and hems every time.
Sewing the Hem
Creating a Hemline on Curtains
Time to get pro with your curtains! Hemming is an important step to give them a polished finish. It adds weight to the fabric, so they hang evenly. Here’s how to do it:
Start by measuring and marking where you want the hemline. Cut off the excess fabric. Fold up the bottom edge by half an inch and press down with an iron to create a crease. Then, fold up again by one inch, press, pin, and sew.
Stitches should be neat and even. For a clean look, iron over them one final time.
Remember, hems depend on personal preferences. Feel free to adjust based on fabric thickness or height. Try out different options before committing to sewing each panel!
Finishing Touches
To put the finishing touches on your curtains, we have a solution for you. With the section named ‘Finishing Touches’ and the sub-sections ‘Ironing the Finished Hem’ and ‘Hanging the Curtains’, you can achieve a polished look for your curtains. Let’s delve into the details of each sub-section to get the complete picture.
Ironing the Finished Hem
Get a Professional Flair with Heat and Pressure!
Ironing is key for a professional finish. Heat and pressure make hemlines smooth and wrinkle-free. But, it takes attention to detail and the right tools.
Here’s a 6-step guide to make it happen:
- Adjust the temperature of your iron according to fabric type.
- Lightly spritz the fabric with water. Not too much!
- Fold up or turn the garment inside out. Only the hem should be visible.
- Start from one end and gradually move forwards while pressing along the hem.
- For even smoother fabric, add a pressing cloth too thin or delicate fabrics.
- Finish with steam or damp pressing cloth before moving to the next section.
Check all areas of the garment have been pressed properly before taking it off the ironing board.
Make sure to read the garment tag for special care instructions for certain fabrics.
Attention to detail is key to great results. Follow this technique for a perfect finish.
Hanging the Curtains
The last step in perfecting your room is hanging curtains! This adds texture and warmth to your decor. Here’s how:
- Measure your windows to find the width and height.
- Pick a rod that fits your style. Measure it and decide where to place it.
- Install brackets evenly above or outside frame corners for the rod.
- Position each panel on the rod pocket, smooth out wrinkles, and insert the rod into the brackets.
- Turn the hems back, adjust panel widths, and tie back or pin on metal rings (optional).
Also, consider the functionality and durability of the fabric. Some materials may look nice but not provide enough insulation or sun-blocking.
To ensure that the curtains fit perfectly, hang one panel at a time using a level gauge. This avoids unevenness.
Finally, take time after installation to fluff out any wrinkles. This creates a cleaner look and enhances natural light.
Troubleshooting Tips
To troubleshoot common hemming mistakes and ensure perfect curtains, you need to know how to rectify the mistakes. In this section ‘Troubleshooting Tips’, we have two sub-sections: ‘Common Hemming Mistakes’ and ‘Fixing Uneven Hems’. These sub-sections will provide you with solutions to the most common hemming problems to make your curtains look their best.
Common Hemming Mistakes
Hemming is an essential skill for sewing and tailoring. It gives a neat finish to garments, curtains, and other materials. Sadly, it’s easy to make errors that lead to disappointing results. These are the five things to be wary of when hemming:
- Miscalculating
- Cutting the fabric too short
- Neglecting to press the hem before stitching it
- Using the wrong thread
- Making the stitches too visible
Miscalculations can cause the hem to be uneven, or create waves in the fabric. Cutting it too short can make the material buckle or fray over time. Pressing the hem prior to stitching gives a more defined line, which is easier to follow.
Using an incorrect thread can make the end result look less professional and not last as long. The stitches should be subtle, so they don’t take away from the finished product.
Remember that some fabrics require a different type of hem. Chiffon, for example, needs a rolled hem instead of a traditional one.
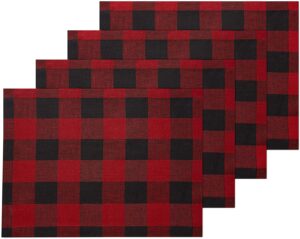
By avoiding these common mistakes, you’ll get perfect results each time! However, if you prefer ready-made options, Discover Plaid Curtain Designs at our store for a range of stylish and cozy choices.
Fixing Uneven Hems
Uneven Hemlines can be a real annoyance that ruins your outfit. But, there’s no need to worry! Here’s a five-step guide to rectifying it without any hassle!
- Measure the hemline height from each corner of the fabric.
- Pin the fabric and use a ruler to check if both sides are balanced.
- If there’s a difference, cut and re-stitch the top layer of the skirt or pants.
- If it’s minor, use tailor tape to make slight alterations.
- Examine the hems again to make sure they meet perfectly from all angles.
Before you begin, ensure that your workspace is level. That way, you can avoid any complications or major issues while fixing the hemlines.
Summary of Hemming Curtains Process
Hemming Curtains: A Pro Guide!
Measure the length with a tape measure. From the top of the panel to the desired hem.
Fold up the fabric and mark it with the tailor’s chalk or pins.
Trim off excess fabric beyond the line.
Sew a straight line along the line. Sewing machine or needle and thread.
Fabric type, thread color, and hem style are factors to consider.
Hemming curtains can be daunting. But with these steps, anyone can get professional-looking results!
Frequently Asked Questions
Q: What materials do I need to hem curtains?
A: You will need a measuring tape, fabric scissors, pins, a needle, thread, and an iron.
Q: How do I measure the curtain length for hemming?
A: Measure from the top of the curtain to the desired length. Add an extra inch for the hem. Repeat on all curtain panels.
Q: How do I mark the hemline on the curtains?
A: Fold the bottom edge of the curtain up to the desired length and press with an iron. Use pins to hold the fabric in place.
Q: What is the best stitch to use for hemming curtains?
A: Use a straight stitch or a blind hem stitch on a sewing machine. For hand-sewing, use a slip stitch.
Q: How much fabric do I need to hem the curtains?
A: This depends on the length and width of the curtains. Measure each panel and add an extra inch for the hem. Calculate the total fabric needed by multiplying the length by the width.
Q: How do I finish the hem on the curtains?
A: Trim any loose threads and press the hem with an iron. Fold the bottom edge of the curtain up again and sew the hem with a straight or blind hem stitch.