Ever gazed at your worn-out shirts, thinking they could be repurposed into something more? You’re in the right place! This detailed guide will walk you through the process of creating pillows from shirts, blending creativity with sustainability. This isn’t just a crafting project; it’s a journey of preserving memories, customizing your home, and maximizing resources. So, why delay? Embark on this exciting DIY adventure now and learn how to convert your cherished shirts into distinctive, comfortable pillows that bring a personal flair to your home!

Choosing the Right Shirts
When making pillows out of shirts, the right shirt choice is crucial for a successful project. To ensure that your materials will match well and create the desired effect, follow these tips:
- Consider the fabric – As you will be sleeping on these pillows or using them for decoration, it is essential to choose a durable and comfortable fabric such as cotton or flannel.
- Check the size – Choose a shirt that will provide enough material to cover the pillow form and leave space for seam allowances. A larger size is always better than a smaller one.
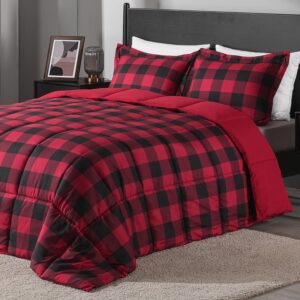
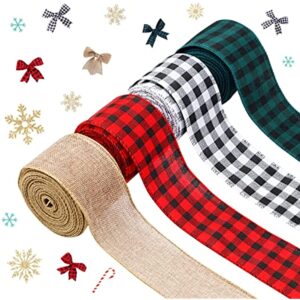
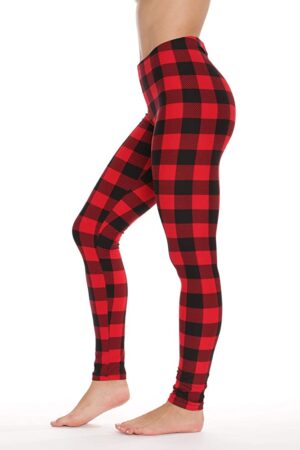
- Select a pattern – Depending on your preference and overall decor scheme, you might want something plain or printed. If you are interested in a rustic design, why not try the Cozy Buffalo Plaid Pillows? Make sure the pattern fits with your existing decor if that is your aim.
- Color coordination – To bring everything together seamlessly, ensure that the shirt color (or colors) complements other elements in the room where you plan to use these pillows.
- Cleanliness – Make sure all chosen shirts are clean before proceeding with cutting them up and sewing them into pillows. You don’t want any unpleasant surprises while working on your project.
- Repurposing or not: Decide whether you want to repurpose old shirts or buy new ones. If reusing old ones, make sure they have no holes or tears and are not overly worn out from extended use.
Make sure you select colorful; bright fabrics if possible when making throw cushions out of shirts for decoration purposes in common rooms.
When it comes to selecting the right shirt for creating pillows out of it, these decisions are vital to give a successful result. Consider factors like color coordination, and choosing appropriate fabrics & patterns while selecting from available options.
Preparing Shirts for Pillow Creation
One crucial aspect of creating pillows out of shirts is preparing the shirts themselves. This involves several steps that must be taken to ensure that the shirt makes for a suitable pillow.
To prepare your shirt for turning it into a pillow, follow these six straightforward steps:
- Wash and dry the shirt: Before anything else, you will want to ensure that the shirt is clean and free from any dirt, sweat, or other grime which bears no reassurance in terms of longevity and clarity.
- Cut off the sleeves: Use scissors to remove both sleeves from the shirt. Cut as close to the seam as possible so that there are no jagged edges remaining on the body of the shirt.
- Turn it inside out: Turn the shirt inside out by pulling it through one of its sleeves’ ends. The seams should now be visible on top.
- Sew up open areas: Now, sew up any open areas like button plackets or gaps if available anywhere with either needle or machine stitching; otherwise, they might prove problematic during filling later
- Cut out excess fabric: Cut off any excess fabric at this point before moving forward with stuffing your new pillow.
- Iron it flat – This step is optional but recommended as it helps flatten out creases and ensures that your pillow will look neat once filled.
Remember also to consider unique details such as using different types of shirts for your pillows, such as dress shirts for a more formal look.
By ensuring that you properly prepare your shirts before beginning to create them into pillows, you can help ensure great-looking pillows made from quality materials.
Cutting Shirts to Size
When making pillows out of shirts, the first step is cutting shirts to size. This is an essential part of the process as it determines how the pillow will look and feel. It’s important to measure accurately and cut with precision to get the desired outcome.
Here’s a six-step guide on cutting shirts to size:
- Choose the shirt you want to use and ensure that it’s clean.
- Lay the shirt flat on a table or surface.
- Carefully remove any buttons, pockets, or zippers from the shirt.
- Decide what size you want your pillow to be and then mark out that size on your shirt using a fabric pen or chalk.
- Cut out your marked shape along with both layers of fabric making sure they are cut in unison
- Your fabric should now have two pieces that are equal in shape and size – these will form the front and back of your pillow
It’s worth noting that when cutting shirts to size, you can play around with different parts of the shirt – such as sleeves, collars, or designs – if you’re looking for something unique. However, it’s vital to bear in mind that if you’re repurposing an old shirt for this project, make sure there are no holes or weak spots within each piece dedicated for replacement as these could reduce durability. Cutting shirts to size may take some time but is crucial in providing consistent pillows’ overall texture and appearance.
Sewing the Two Sides Together
When making pillows out of shirts, it’s important to sew the two sides together to ensure the pillow retains its shape and stays sturdy. This step can seem tricky, but with some focus and patience, the end result will be worth it.
To sew the two sides together, follow these four steps:
- Turn the shirt inside out to expose the seams.
- Pin both sides together, ensuring that they’re evenly aligned. This helps prevent bunching or warping after sewing.
- Sew along three edges, leaving one edge open for stuffing. Use a straight stitch for stability.
- Once finished sewing, turn the shirt back right-side out through the opening and begin stuffing your pillow!
Don’t forget to double-check your stitches before stuffing! A secure seam is key to keeping your pillow looking sharp.
Unique details also include using a heavy-duty needle when sewing thicker fabrics like flannel or denim shirts. Additionally, consider inserting piping or adding a decorative border to elevate your creation further. Remember that this project is all about being inventive and recycling old clothes into new household items!
Stuffing and Finishing the Pillow
After completing the task of cutting and sewing, you must move on to the interesting part – stuffing and finishing the pillow. This stage requires focus and attention to detail as it determines how your final product will look. Follow these 3 steps for a perfect outcome:
Step 1: Stuffing
Use cotton, feathers, or synthetic stuffing to fill your pillow. With a small opening left from the previous stage, fill in your chosen stuffing material. Make sure not to overstuff as this could make the pillow uncomfortable or hard. Once filled, sew up the remaining hole using a needle and thread.
Step 2: Finishing
Choose a decorative finish that compliments the pattern on your shirt. You can use lace, buttons, or embroidery if desired. Sew these onto your fabric to enhance its look.
Step 3: Enhancements
To further personalize your design, consider adding extra details such as tassels or stitching on unique designs. These smaller embellishments can add real character to any project.
Voila! That’s it — you have now successfully created an attractive and long-lasting pillow out of something old and unused in no time at all!
Additional Tips for Making Pillows Out of Shirts
Pillows can be made out of old shirts, and there are some additional tips to keep in mind.
| 1. make sure that the shirt is colorful enough to create an attractive pillow. |
| 2. clean the shirt thoroughly before cutting and stitching it. |
| Finally, choose a comfortable filling that will not lose its shape over time. |
One unique detail to consider when making pillows out of shirts is whether to use short-sleeved or long-sleeved shirts. Long sleeves can provide more material for larger pillows or additional decorative accents, while short sleeves may be easier to work with and require less material overall. Ultimately, the choice will depend on personal preference and the desired final result.
Overall, transforming old shirts into cozy pillows is a great way to breathe new life into old clothing. By following these additional tips and getting creative with the design process, anyone can turn their favorite shirts into unique and comfortable home decor pieces.
Choosing the Right Shirts
When creating pillows out of shirts, the first step is crucial – choosing the right shirts. It’s not just about picking any old shirt; you need to take into account factors such as size, material, and style.
1. consider the size of the shirt. For larger pillows, choose a larger shirt, while smaller pillows may require a smaller shirt. The material of the shirt also contributes to how comfortable and durable your pillow will be – a soft cotton t-shirt could make for a cozy option, whereas a sturdier denim fabric could hold up better over time.
2. take into account the style of the shirt. A patterned or graphic tee could make for an eye-catching pillow cover, while a plaid button-down could bring some rustic charm to your pillow collection. Don’t be afraid to experiment!
Lastly, consider any sentimental value that a particular shirt may hold – maybe it’s from a special event or has a sentimental value from a loved one. Upcycling it into a unique and personalized pillow would be an excellent way to give it new life. For additional ideas to complement your decor, you can Browse Pillow Collection.
Choosing the right shirts can be an enjoyable part of making your own DIY pillows. With so many options out there, let your creativity shine and pick which ones speak to you!
Preparing Shirts for Pillow Creation
Transforming a shirt into a pillow requires necessary preparation. Don’t fret, read below to learn how to transform shirts into comfortable pillows fitting for any interior in your home.
1. Remove sleeves and collar: To commence the process of transforming shirts into desired pillows, start by getting rid of the sleeves and collar. This can be achieved via cutting.
2. Verify size: To ensure that your pillow is not too small or too large, you should confirm its size with a measuring tape.
3. Seal off the button line: Make sure to sew the button line shut to keep its shape when stuffing it with cushion fillers.
4. Sew sides together: Sew up two sides leaving one side open for filling later on.
5. Cut off excess fabric: Trim away any excess fabric after sewing to ensure neatness in appearance.
6. Flip right side out: After sewing and trimming off excess fabric, flip your completed pillow right side out.
It’s important to note that you may opt to add personal touches such as embroidery or stamping unique designs onto the shirts before proceeding with these preparatory steps.
In finishing, be creative! Experiment with different shirt textures or patterns as they can enhance the final outcome of your pillow product beyond expectations – all this while recycling clothes you no longer use!
Cutting Shirts to Size
When creating pillows out of shirts, it is essential to cut them to the appropriate size. This step is crucial to ensure that your pillow comes out just how you envision it. Here’s how you can get the right size:
| Step | Instructions |
|---|---|
| Step 1 | Lay your shirt on a flat surface, then measure and mark the fabric’s middle section. |
| Step 2 | Cut along the marked line, splitting your shirt into two pieces. |
| Step 3 | Turn one piece around, aligning the edges with the other half of the shirt. |
| Step 4 | Sew all edges together, leaving an opening for stuffing. |
Pay close attention when measuring and cutting so that you get as much fabric as needed for your pillow. You don’t want to end up with a smaller or unevenly-shaped pillow due to inaccurate cutting. The positioning of the centerline also plays a crucial role in getting equal parts and shapes of the halves. With these steps in mind, you’re now ready to turn those old shirts into beautiful pillows!
Sewing the Two Sides Together
Once you have cut the shirts to size and stuffed them with filling, it’s time for the final step – sewing the two sides together. This step is crucial to ensure that your homemade pillow stays intact and secure.
To sew the two sides together, follow these six simple steps:
- Place both sides of the shirt pillow on top of each other with the right sides facing inward.
- Pin around three edges of the pillow, leaving one edge unsewn.
- Sew along the pinned edges using a sewing machine or a needle and thread while leaving a 1/4″ seam allowance.
- Cut off any excess fabric and turn the pillow right side out through the unsewn edge.
- Insert your filling material and fluff until it’s evenly distributed throughout the pillow.
- Hand stitch or use a sewing machine to sew up the remaining edge, ensuring that no filling material escapes.
To add some uniqueness to your pillows, consider adding decorative elements like buttons or embroidery. And there you have it – perfectly crafted pillows made from old shirts!
Stuffing and Finishing the Pillow
After creating the perfect pillow cover from an old shirt, it is time to stuff and finishes it to transform it into a comfy accessory. Follow these simple steps to complete your pillow-making project.
1. Choose the right stuffing material
Choose the right stuffing material ensuring that you have enough filling for the size of your pillow. There are a variety of options available including polyester fiberfill, foam, feathers, or even organic materials like buckwheat hulls. Make sure you choose a material that suits your comfort preference.
2. Stuffing the Pillowcase
Start stuffing your pillowcase with the material you have chosen and add more until it reaches your desired firmness. Be careful not to overstuff as this can make your pillow hard and uncomfortable.
3. Flatten and distribute evenly
Flatten your pillow by pressing it down gently to ensure a smooth and well-distributed fill inside.
4. Sew the remaining edge
Sew up the remaining open edge with a needle and thread or a sewing machine, ensuring that all edges match up properly with no gaps.
5. Trim any Excess Material
Trim any excess material using fabric scissors, and cut off any loose threads that may be hanging out of seam lines.
6. Finishing Touches
Add finishing touches like buttons or decorative elements such as ribbons or lace trims around the edges if desired to give your new pillow a personal touch!
Don’t forget to store in a clean dry place for future use.
Remember that taking care of each detail will guarantee not only an aesthetically pleasing accent piece but also one that will give you enjoyable restful moments every night!
Additional Tips for Making Pillows Out of Shirts
When it comes to repurposing old and unused shirts, making pillows can be a creative and resourceful solution. To make the most out of this craft, here are some additional tips for making pillows out of shirts.
- Choose the right shirt – Ensure that the shirt you choose is in good condition and has enough fabric for your desired pillow size.
- Cut with precision – Use a sharp pair of scissors to cut the fabric according to your desired pillow measurements. Make precise cuts to avoid fraying and uneven edges.
- Consider stuffing options – There are various stuffing options for pillows such as foam, polyester filling, or feather down. Choose the best option that will suit your desired comfort level.
- Add unique accents – Adding unique accents like buttons or patches can give your pillow a personalized touch. You can also experiment with different patterns by mixing and matching fabric scraps from other shirts.
- Secure all openings – Once you’re done stuffing the pillow, ensure that all openings are secure by hand-sewing them shut with thread and needle.
Lastly, consider using old ties instead of standard piping material which could add a distinct look to your new creation.
By applying these additional tips during your DIY project, you’ll end up with an impressive pillow that’s not only stylish but also environment-friendly!