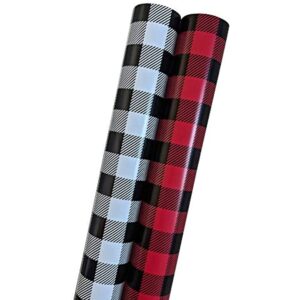
In this step-by-step crafting guide, you will learn how to make your very own shower curtain liner. Whether you’re looking to customize the design or simply enjoy the satisfaction of creating something yourself, this guide will walk you through the process. With detailed instructions and helpful tips, you’ll be able to create a personalized shower curtain liner that fits your style and enhances your bathroom decor. So grab your materials and let’s get started on this fun and creative project!
Gathering Your Materials
Selecting the right type of fabric
When choosing the fabric for your homemade shower curtain, it’s important to consider a few factors. Look for a fabric that is durable and can withstand regular exposure to moisture. Additionally, select a fabric that is easy to clean and maintain. Fabrics such as polyester or nylon are often good choices for shower curtains as they are waterproof and resistant to mold and mildew.
Choosing a fabric with waterproof properties
To ensure that your shower curtain effectively keeps water within the shower area, opt for a fabric with waterproof properties. You can find fabrics that are specifically designed for this purpose or consider applying a waterproofing spray to your chosen fabric. This will help to prevent water from penetrating the curtain, keeping your bathroom floor dry.
Identifying necessary hardware and tools
Before you begin making your shower curtain, make sure you have all the necessary hardware and tools. You will need a sewing machine, scissors, measuring tape, pins, thread, and a curtain rod. Additionally, if you decide to add grommets or buttonholes to your curtain, you will need the appropriate tools for that as well.
Estimating the amount of fabric needed based on shower dimensions
To ensure that you have enough fabric for your shower curtain, it’s important to accurately estimate the amount needed based on the dimensions of your shower. Measure the length and width of your shower area, and add a few extra inches to account for seams and hems. This will ensure that your curtain is the perfect fit for your shower.
Measuring Your Shower
Taking accurate measurements
To create a well-fitting shower curtain, it’s crucial to take accurate measurements of your shower area. Use a measuring tape to measure the length and width of your shower, ensuring that you measure from the top of the curtain rod down to where you want the curtain to end.
Calculating length and width of curtain
Once you have measured your shower, calculate the length and width of your curtain based on your measurements. Remember to add a few extra inches to account for seams and hems. This will ensure that the curtain covers your entire shower area and provides adequate coverage.
Deciding on extra fabric for seams and hems
When calculating the length and width of your curtain, it’s important to include extra fabric for seams and hems. Seams will prevent the fabric from fraying, and hems will provide a finished look to the curtain. Adding a few extra inches for these purposes will ensure that your curtain is both functional and visually appealing.
Considering height of the curtain rod
Take into account the height of your curtain rod when measuring your shower. If your curtain rod is positioned higher than standard, you may need to adjust the length of your curtain accordingly. It’s important to ensure that the curtain hangs at the desired height and provides the necessary privacy.
Cutting the Fabric
Checking fabric for defects before cutting
Before cutting your fabric, carefully inspect it for any defects or imperfections. Look for any tears, holes, or stains that may affect the quality and appearance of your curtain. It’s best to address these issues before cutting to avoid wasting fabric and time on a flawed product.
Aligning fabric on cutting surface
Place your fabric on a clean and flat cutting surface, such as a large table or cutting mat. Make sure the fabric is aligned and lies flat without any wrinkles or folds. This will ensure that your measurements and cuts are accurate.
Marking fabric accurately
Using a fabric pen or chalk, mark the measurements for your curtain directly on the fabric. Pay attention to the measurements you calculated earlier, making sure to mark both the length and width of the curtain accurately. Double-check your markings to avoid any mistakes before cutting.
Using appropriate cutting tools
To ensure clean and precise cuts, use appropriate cutting tools for your fabric. Sharp fabric scissors or a rotary cutter are recommended for cutting through the fabric smoothly and accurately. Take your time and follow your marked measurements to avoid any errors.
Adding the Headers
Creating pocket for curtain rod
To allow your curtain to slide smoothly on the curtain rod, create a pocket at the top of the curtain. Fold over a small portion of the fabric, approximately 2 inches, and sew along the edge to create a tube-like pocket. This pocket will accommodate the curtain rod and provide a neat and finished look to your shower curtain.
Determining size of the header
The size of the header will depend on the diameter of your curtain rod. Measure the diameter of your curtain rod and add an inch or two to allow the curtain to glide easily. This will ensure that the header fits snugly around the curtain rod without being too tight or too loose.
Sewing the header
Fold the top edge of your fabric, where the pocket was created, down to the desired length for your header. Pin it in place and sew along the edge of the fold to secure the header. Take your time to ensure that the stitching is straight and even, as the header will be visible when the curtain is hung.
Ensuring the rod fits through the header
Before finishing the header, test that your curtain rod can easily slide through the pocket. If the rod fits smoothly without any resistance or difficulty, you can proceed with the remaining steps. If the rod is too tight or loose, adjust the size of the pocket as necessary to ensure a proper fit.
Sewing the Sides
Creating a clean, straight edge
To achieve a professional-looking finish, create a clean and straight edge on both sides of your curtain. Trim any uneven edges or excess fabric, making sure that both sides are symmetrical and of equal length.
Folding and ironing for a crisp seam
Fold over approximately half an inch of fabric on each side of the curtain and iron it to create a crisp and even seam. This will ensure that the fabric stays in place and doesn’t fray along the edges. Use pins to hold the folded fabric in place before sewing.
Sewing the side seams
Using a sewing machine or a needle and thread, sew along the folded edge of each side to secure the seam. Be sure to remove the pins as you sew to avoid any mishaps. Sewing a straight and even seam will contribute to the overall quality and durability of your homemade shower curtain.
Checking quality of stitches
Once you have sewn the side seams, take a moment to examine the quality of your stitches. Ensure that they are straight, even, and securely holding the fabric together. If necessary, reinforce any weak spots by sewing over them again. This will help to prevent any unraveled seams in the future.
Sewing the Bottom Hem
Deciding on hem length
The length of the bottom hem is a matter of personal preference and style. Consider the overall look you want to achieve for your shower curtain. A shorter hem may create a more modern and streamlined look, while a longer hem can add elegance and heighten the visual impact of the curtain.
Creating a fold for the hem
Fold up the bottom edge of your fabric to the desired length for your hem. Iron the fold to create a crisp edge that will be easier to sew. Use pins to hold the folded fabric in place before proceeding to sew the hem.
Ironing the hem
Before sewing the hem, take a moment to iron it again. This will ensure that the fold is neat and even, providing a professional finish to your shower curtain. Remove the pins as you iron, and make any necessary adjustments to the fold.
Sewing the bottom hem
Using a sewing machine or a needle and thread, sew along the folded edge of the bottom hem to secure it in place. Take your time and sew a straight and even seam to maintain the overall quality and appearance of your shower curtain. Remember to remove any pins as you sew.

Adding Grommets or Buttonholes
Deciding on grommets versus buttonholes
Consider whether you prefer to incorporate grommets or buttonholes into your shower curtain. Grommets are metal or plastic rings that reinforce the holes for the shower curtain hooks, while buttonholes are openings sewn directly into the fabric. Both options can provide a secure and functional attachment for your curtain hooks.
Measuring and marking for grommets or buttonholes
If you choose to add grommets, measure and mark the appropriate positions along the top edge of your curtain. Ensure that the marks are evenly spaced and aligned on both sides. If you prefer buttonholes, measure and mark the desired positions along the top edge of your curtain. Use a ruler or measuring tape to ensure accurate spacing.
Creating grommets or buttonholes
Using the appropriate tools, follow the instructions provided with your grommets or buttonhole kit to create the necessary openings in your shower curtain. Take your time and follow the instructions carefully to achieve clean and properly sized grommets or buttonholes. Test the fit of your shower curtain hooks to ensure they glide smoothly through the openings.
Checking quality and fit of grommets/buttonholes
After adding grommets or buttonholes to your shower curtain, take a moment to check the quality and fit of these openings. Ensure that grommets are securely fastened and that buttonholes are reinforced and resistant to tearing. Test the fit of your shower curtain hooks once again to ensure a smooth and functional attachment.
Testing Your Shower Curtain
Installing the curtain onto the shower rod
With your shower curtain complete, it’s time to install it onto the curtain rod. Slide the curtain hooks through the grommets or buttonholes, ensuring that each hook is securely attached. Hang the curtain onto the shower rod and adjust it as necessary to achieve the desired position and appearance.
Checking for correct width and length
Once the curtain is installed, check that it spans the width and length of your shower adequately. The curtain should cover the entire shower area, preventing water from splashing out. Ensure that it provides the desired level of privacy while allowing for easy access in and out of the shower.
Ensuring fabric is waterproof
Take a moment to test the waterproof properties of your curtain. Spray some water onto the curtain and observe whether it beads up and rolls off, indicating that the fabric is indeed waterproof. If water seeps through the fabric, consider applying a waterproofing spray or choosing a different fabric for your next homemade shower curtain.
Making necessary adjustments
If you notice any flaws or areas that require adjustment, take the time to address them before using your shower curtain regularly. This may include sewing any loose stitches, reinforcing weak spots, or making changes to the fit or appearance of the curtain. Remember that the goal is to create a functional and visually appealing shower curtain that will enhance your bathroom.

Caring for Your Homemade Shower Curtain
Cleaning recommendations
To keep your homemade shower curtain looking its best, follow the cleaning recommendations for the fabric you chose. Most fabrics can be machine-washed on a gentle cycle using mild detergent. Hang the curtain to dry or tumble dry on low heat if allowed by the fabric manufacturer. Avoid using harsh chemicals or bleach that may damage the fabric.
Inspecting for wear and tear
Regularly inspect your shower curtain for any signs of wear and tear. Look for loose threads, fraying edges, or weakened seams. Address any issues promptly to prevent further damage or the need for more extensive repairs. Taking good care of your shower curtain will prolong its lifespan and maintain its functionality.
Potential repairs and maintenance
If your shower curtain requires repairs, such as fixing a torn seam or replacing a grommet, take the time to address these issues. Refer to the appropriate sections in this article for guidance on how to mend or replace specific components of your shower curtain. Regular maintenance and timely repairs will ensure that your shower curtain continues to serve its purpose effectively.
Conclusion
Recap of the process
Congratulations on successfully making your own shower curtain! In this comprehensive guide, we covered various steps involved in creating a homemade shower curtain. We started by gathering the necessary materials, selecting the right fabric, and estimating the amount needed. Next, we discussed the importance of accurate measurements, cutting the fabric, and adding headers, side seams, and a bottom hem.
We then explored the option of adding grommets or buttonholes to hang the curtain. Following that, we talked about testing the curtain’s fit, checking for proper waterproofing, and making any necessary adjustments. Lastly, we discussed the importance of caring for your homemade shower curtain, cleaning recommendations, inspecting for wear and tear, and potential repairs and maintenance.
Benefits of homemade shower curtain
By making your own shower curtain, you have the opportunity to customize the look and feel of your bathroom. You can choose a fabric that matches your decor, select the ideal length and width for your shower, and even add personal touches such as unique patterns or designs. Creating your own shower curtain allows you to express your creativity and style while also saving money compared to purchasing a pre-made curtain.
Future customization possibilities
Now that you have successfully made your first homemade shower curtain, the possibilities for future customization are endless. Consider experimenting with different fabrics, patterns, or embellishments to create unique and eye-catching curtains. You can also explore additional features such as tie-backs, valances, or trimmings to further personalize your bathroom decor. Enjoy the process of creating beautiful and functional shower curtains that reflect your personal taste and style!


