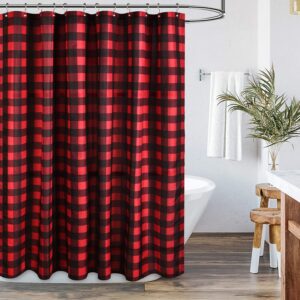
Are you tired of the same old, mass-produced shower curtains that you find in every home decor store? Why not add a personal touch to your bathroom by crafting your own unique shower curtain? In this article, we will guide you through the process of sewing a custom shower curtain that will perfectly match your style and transform your bathroom into a space that truly reflects your personality. From choosing the right fabric to adding finishing touches, we will provide you with all the necessary steps and tips to create a one-of-a-kind bathroom accent that you can be proud of. So grab your sewing kit and get ready to embark on a fun and creative project that will result in a stunning and personalized addition to your home.

Considering the Choices
When it comes to shower curtains, there are endless options available in stores. However, if you’re looking to add a personal touch to your bathroom, consider making your own homemade shower curtain. Not only will this allow you to unleash your creativity, but it also comes with numerous benefits.
Understanding the benefits of a homemade shower curtain
a homemade shower curtain offers several advantages over store-bought alternatives. Firstly, you have complete control over the design, allowing you to match it perfectly with your bathroom decor. Whether you prefer bold patterns, elegant florals, or soothing colors, a homemade shower curtain enables you to create a unique statement piece that reflects your personal style.
Additionally, making your own shower curtain gives you the freedom to choose high-quality materials. Unlike mass-produced options, you can select a durable fabric that will withstand the test of time and daily use. By investing in a homemade shower curtain, you can ensure that it will remain in excellent condition for years to come.
Considering the desired look and feel
Before diving into the process, it’s important to consider the aesthetic you wish to achieve in your bathroom. Take a moment to visualize the atmosphere you want to create. Do you want your shower curtain to be the focal point, or would you prefer it to complement other elements in the room?
Think about the overall style of your bathroom. If you have a minimalist, contemporary space, you may opt for a simple and clean design. On the other hand, if your bathroom embraces a more bohemian or eclectic vibe, you might lean towards vibrant patterns and bold colors.
By determining the desired look and feel, you can narrow down your options and have a clear direction when it comes to selecting the materials and design for your homemade shower curtain.
Choosing a specific style or design
Once you have a vision in mind, it’s time to choose a specific style or design for your shower curtain. This decision will ultimately depend on your personal preferences and the overall aesthetic of your bathroom.
If you’re going for a classic and timeless look, you may opt for a solid-colored curtain with a subtle texture. This choice allows you to experiment with different fabric types, such as linen or cotton, which provide a natural and relaxed feel to the space.
On the other hand, if you’re looking to add a bold statement to your bathroom, consider selecting a vibrant pattern or print. This can instantly inject personality into the room and become a focal point. Whether it’s floral, geometric, or abstract, the possibilities are endless when it comes to choosing a design for your homemade shower curtain.
Choosing the Materials
When it comes to selecting the materials for your homemade shower curtain, there are a few key considerations to keep in mind. From the fabric to the thread to the shower curtain liners, each component plays a crucial role in creating a durable and visually appealing final product.
Selecting the right fabric
Choosing the right fabric is essential for a homemade shower curtain that will withstand the moisture and humidity of the bathroom environment. Look for fabrics that are water-resistant or treated to be waterproof. Common options include vinyl-coated or laminated fabrics, which are often used for shower curtains due to their durability and ease of cleaning.
If you prefer a more natural and eco-friendly option, consider using a fabric like nylon or polyester. These materials can be treated with a waterproofing spray to enhance their resistance to moisture. However, keep in mind that natural fabrics like cotton or linen may not be the best choice for a shower curtain as they tend to absorb water and take longer to dry.
Choosing the type of thread
When it comes to sewing your homemade shower curtain, choosing the right thread is crucial. Opt for a high-quality polyester or nylon thread that is strong and resistant to moisture. These threads are less likely to degrade in the damp bathroom environment and will ensure that your shower curtain lasts for a long time.
Additionally, consider using a thread color that complements your chosen fabric and design. A well-matched thread will provide a professional finish to your project and enhance the overall aesthetic appeal.
Understanding the differences in shower curtain liners
In many cases, a shower curtain liner is necessary to prevent water from seeping through the fabric curtain and onto the bathroom floor. When selecting a liner, choose one that is waterproof and mold-resistant. Vinyl liners are a popular option as they are affordable, easy to clean, and provide effective water protection.
Fabric liners, such as polyester or nylon, are another alternative that offers a softer and more luxurious feel. They can be machine washed and are less likely to accumulate mold or mildew. Ultimately, the choice between vinyl and fabric liners depends on your personal preference and desired level of maintenance.
Picking the right type of curtain rings
The final consideration when it comes to materials is selecting the right type of curtain rings. These rings are essential for attaching the shower curtain to the rod and ensuring smooth opening and closing. There are various options available, including plastic, metal, or decorative rings.
Plastic rings are cost-effective and widely available, making them a popular choice. Metal rings, such as stainless steel or brass, offer increased durability and a sleek, modern look. Decorative rings, featuring unique designs or patterns, can add an extra touch of style to your homemade shower curtain.
When choosing curtain rings, consider the weight of your fabric and the overall aesthetic you want to achieve in your bathroom. It’s important to select rings that can adequately support the weight of your curtain and complement its design.

Sourcing the Equipment
Now that you have an understanding of the materials required, let’s dive into sourcing the equipment needed for your homemade shower curtain project. From the sewing machine to various sewing tools, having the right equipment will ensure a smooth and enjoyable crafting process.
Identifying the most suitable sewing machine
Having a reliable sewing machine is essential for creating a professional-looking shower curtain. If you already own a sewing machine, it’s important to ensure that it is in good working condition and can handle the fabric you have chosen.
If you don’t have a sewing machine or need an upgrade, consider the features that will be most useful for your specific project. Look for a machine with adjustable stitch length and width, as this will allow you to customize your sewing according to the fabric and design.
Additionally, consider the type of fabric you will be working with. If you plan on using heavy or thick materials, such as vinyl, a heavy-duty or industrial sewing machine may be necessary. Conversely, if you’re working with lighter fabrics, a basic home sewing machine will suffice.
Listing the necessary sewing tools
In addition to a sewing machine, several essential sewing tools will make the process of creating your homemade shower curtain easier and more efficient. These tools include:
-
Fabric scissors: These specialized scissors have sharp blades that make clean and precise cuts through fabric. Invest in a high-quality pair of fabric scissors to avoid frayed edges and uneven cuts.
-
Straight pins: These small, sharp pins are used to hold fabric pieces together before sewing. They ensure that the fabric stays in place while you work, preventing any shifting or misalignment.
-
Seam ripper: A seam ripper is a small tool with a pointed end that is used to remove stitches. It comes in handy if you make any mistakes or need to readjust seams during the sewing process.
-
Iron and ironing board: An iron is essential for pressing and flattening fabric, ensuring precise seams and a professional finish. Set up an ironing board in your sewing area for easy access.
-
Sewing gauge or ruler: This tool is used for measuring and marking fabric, ensuring accuracy throughout the sewing process. Opt for a long ruler or tape measure that can handle the length of your shower curtain panels.
Understanding the importance of a long ruler or tape measure
A long ruler or tape measure is a crucial tool when it comes to crafting a shower curtain. This tool allows you to accurately measure and mark your fabric, ensuring that your panels are the correct size and that any additional design features are properly placed.
When selecting a ruler or tape measure, opt for one that is at least as long as the longest side of your shower curtain. This will allow you to measure the full length without needing to constantly reposition the ruler. Additionally, choose a ruler or tape measure with clear markings that are easy to read and won’t fade over time.
Considering additional creative tools
While not essential, additional creative tools can elevate the design and visual appeal of your shower curtain. These tools may include fabric pens or markers, stencils, or even fabric dye. If you have a specific design in mind or want to add extra details to your curtain, consider incorporating these creative tools into your crafting process.
Experimenting with different techniques and materials can result in a truly unique and personalized shower curtain. However, it’s important to remember that these creative tools are optional, and your homemade shower curtain will still be beautiful and functional without them.
Creating a Design Plan
With the materials and equipment in place, it’s time to create a design plan for your homemade shower curtain. By mapping out the details ahead of time, you can ensure a smooth and organized sewing process.
Deciding on a standard or custom size
Before starting any measurements or cutting, decide whether you want to create a standard-sized shower curtain or opt for a custom size. Standard shower curtains typically measure 72 inches by 72 inches, fitting most standard bathtubs.
If your shower area requires a different size, such as a longer or wider curtain, consider taking accurate measurements to create a custom-sized shower curtain. This will ensure a perfect fit for your unique bathroom and eliminate the need for down-the-line adjustments.
Sketching the overall design layout
Once you have determined the size of your shower curtain, it’s helpful to sketch the overall design layout. This will allow you to visualize how your panels will fit together and where any additional design features will be placed.
Start by drawing a rough outline of your shower curtain panels, labeling each panel with its corresponding measurements. Then, sketch any patterns or design elements you plan to incorporate. This sketch will serve as a handy reference throughout the sewing process, ensuring that you stay on track and achieve the desired design.
Identify the placement of curtain holes
If you plan on using curtain rings to hang your shower curtain, it’s important to identify the placement of curtain holes in your design plan. Consider how many rings you will be using and how you want them distributed along the top edge of the curtain.
For standard-sized shower curtains, evenly spacing the holes every 6 to 8 inches is typical. However, feel free to adjust the spacing according to your personal preference and the weight of your fabric. Mark the desired locations of the curtain holes on your design plan, ensuring that they align with your panel measurements.
Planning for special design features
If you want to add special design features to your shower curtain, such as ruffles, appliques, or trim, it’s important to plan for them in advance. Consider where these features will be placed and how they will enhance the overall design.
For example, if you want to include ruffles along the bottom hem of your curtain, ensure that you account for the additional fabric needed when measuring and cutting your panels. By planning for these special design features from the beginning, you can avoid any complications or adjustments later in the sewing process.

Measuring the Materials
With the design plan finalized, it’s time to measure the materials for your shower curtain. Accurate measurements are crucial to ensuring that your curtain fits properly and hangs beautifully in your bathroom.
Properly measuring the shower area
To create a well-fitting shower curtain, it’s important to take precise measurements of your shower area. Start by measuring the width and height of the shower opening, ensuring that you account for any extra space needed for the curtain to hang freely.
If you’re working with a tub, measure the width of the tub itself and the height from the top edge of the tub to the desired length of your shower curtain. Write down these measurements to use as a reference when cutting your fabric panels.
Translating measurements to fabric
Now that you have the measurements for your shower area, it’s time to translate those measurements to your fabric. Start by determining the width and length of each fabric panel based on the measurements you previously recorded.
To calculate the width of each panel, add extra inches to the shower area width to allow for gathers or pleats. This additional fabric will create a full and visually appealing curtain. For panel length, add the desired length of your curtain to account for hems and any additional design features.
By calculating the width and length of each panel accurately, you can ensure that your shower curtain will fit perfectly in your bathroom.
Determining the number of fabric panels needed
Based on the measurements you have taken, determine the number of fabric panels needed for your shower curtain. This will depend on the width of your fabric and the desired fullness of the curtain.
If your fabric width is sufficient to cover the entire width of the shower area without seams, you will only need one panel. However, if your fabric width is narrower, you may need to sew multiple panels together to achieve the necessary width.
Calculating the number of panels required will ensure that you have enough fabric and allow you to plan for additional steps in the sewing process, such as aligning seams.
Measuring materials for additional design features
If you have planned any additional design features, such as ruffles, appliques, or trim, make sure to measure the necessary materials for these elements as well. Determine the length and width of each design feature and add those measurements to your overall fabric requirements.
When measuring for additional design features, consider the composition of your shower curtain and how these elements will complement the overall design. Taking accurate measurements at this stage will help prevent any material shortages or surprises during the sewing process.
Cutting the Fabric
With all the measurements in hand, it’s time to cut the fabric for your homemade shower curtain. Proper cutting techniques are crucial to ensure that your fabric panels are accurate, aligned, and ready for sewing.
Implementing proper cutting techniques
When it comes to cutting your fabric, accuracy is key. Start by laying your fabric flat on a large, clean surface, ensuring that it is smooth and free from wrinkles. Use fabric weights or pins to secure the fabric in place and prevent any shifting during the cutting process.
Next, align your ruler or tape measure with the marked measurements from your design plan and carefully cut along the edges. Take your time and use smooth, even strokes to achieve clean and precise cuts. Remember to maintain a steady hand and avoid using too much force, as this can cause the fabric to shift or stretch.
Understanding grainline and how it impacts the cut
One important aspect to keep in mind when cutting fabric is the grainline. The grainline refers to the direction of the fabric threads and plays a crucial role in how the fabric drapes and hangs.
To identify the grainline, examine your fabric closely. You will notice that the threads run parallel to each other in two directions. The lengthwise grain runs along the selvage edge, while the crosswise grain runs perpendicular to the selvage.
When cutting your fabric panels, it’s important to keep the grainline straight and aligned. This will ensure that your curtain hangs evenly and doesn’t twist or distort over time. Take extra care to align your ruler or tape measure with the grainline before cutting to achieve accurate fabric panels.
Ensuring accurate alignment of fabric panels
If you need to sew multiple fabric panels together to achieve the desired width for your shower curtain, it’s essential to ensure accurate alignment during the cutting process. By following a few simple steps, you can create seamless fabric panels that seamlessly blend together.
Start by aligning the selvage edges of the fabric panels, ensuring that they are evenly matched. Pin the panels together along this edge to secure them in place. Then, use your ruler or tape measure to mark the desired seam line on each panel. This will serve as a guide during the sewing process, ensuring that your seams are straight and even.
Once you have marked the seam lines, carefully cut along the edges, maintaining a steady hand and following the marked lines precisely. This will create clean, aligned edges and allow for seamless sewing when joining the fabric panels.
Making provision for seams and hems
When cutting your fabric panels, it’s important to make provision for seams and hems. Seams are the lines where different fabric pieces are stitched together, while hems are the finished edges of the curtain.
When measuring and cutting your fabric panels, add extra inches to the width and length to accommodate for seams and hems. This will ensure that you have enough fabric to create clean and durable finishes.
Consider the specific seam and hem allowances recommended for your chosen fabric type and the desired finished look of your shower curtain. Adding these allowances during the cutting process will streamline the sewing process and eliminate the need for adjustments later on.

Sewing the Curtain
With your fabric panels cut and ready, it’s time to start sewing your homemade shower curtain. This section will guide you through the step-by-step process of creating a beautifully stitched curtain that’s sure to enhance your bathroom’s aesthetics.
Creating and sewing the top hem
Start by creating the top hem of your shower curtain. Fold the top edge of each fabric panel over by the desired hem allowance, usually around 1 to 2 inches. Use pins to secure the fold in place, ensuring that it is even and straight.
If you prefer a clean and professional finish, you can also press the folded hem with an iron before pinning. This will create crisp folds and make the sewing process easier.
Once the hems are pinned or pressed in place, it’s time to sew. Position the fabric under the presser foot of your sewing machine, aligning the fold with the edge of the presser foot. Select a straight stitch and begin sewing along the edge of the fold, removing pins as you go.
Sewing the top hem will give your shower curtain a polished look and prevent fraying of the fabric. Take your time and ensure that your stitching is even and secure for a professional finish.
Sewing side seams and bottom hem
After completing the top hem, it’s time to sew the side seams of your shower curtain. If you’re using a single fabric panel, pin the side edges together, right sides facing each other, to create the desired width. If you’re using multiple fabric panels, align the marked seam lines and pin the panels together before sewing.
Position the pinned fabric under the presser foot of your sewing machine, aligning the edge of the fabric with the presser foot. Select a straight stitch and sew along the pinned edge, removing pins as you go.
Once the side seams are sewn, it’s time to create the bottom hem of your shower curtain. Fold the bottom edge of the fabric panel over by the desired hem allowance, usually around 1 to 2 inches. Secure the fold in place with pins, ensuring it is even and straight.
Again, you can press the folded hem with an iron for a crisp finish before sewing. Position the fabric under the presser foot, align the fold with the edge of the presser foot, and sew along the edge of the fold. Remove pins as you go to prevent any interference with your sewing machine.
Sewing the side seams and bottom hem will complete the basic structure of your shower curtain. Take care to sew straight and even seams to ensure that your curtain hangs beautifully in your bathroom.
Attaching any additional design features
If you have planned any additional design features, such as ruffles, appliques, or trim, it’s time to attach them to your curtain. Follow the specific instructions provided with these design elements, as the process may vary depending on the materials and techniques used.
For ruffles, you will typically create long, narrow strips of fabric and gather or pleat them before attaching them to the curtain. Pin the ruffles in place, ensuring even distribution along the designated areas, and sew along the edges to secure them.
Appliques and trim can be hand-sewn or machine-sewn, depending on your preference and the design of the elements. Position them on your curtain, pin them in place, and carefully sew along the edges to attach them securely.
By following these steps, you can add the desired design features to your shower curtain, elevating its visual appeal and making it truly unique.
Sewing on the curtain ring holes
If you plan to use curtain rings to hang your shower curtain, it’s essential to sew on the curtain ring holes. These holes provide a convenient attachment point for the rings and ensure that your shower curtain hangs smoothly and securely.
Start by marking the locations of the curtain ring holes on the top hem of your shower curtain. Use your design plan as a reference for spacing and alignment. Once marked, carefully cut small slits or holes at each marked location, ensuring that they are just large enough to accommodate the curtain rings.
To reinforce the fabric around the holes, you can add small fabric rectangles or apply a thin strip of interfacing on the backside of the holes before sewing. This will prevent the fabric from fraying or tearing with repeated use.
Using a zigzag stitch or a buttonhole stitch on your sewing machine, sew around each hole to secure the fabric and create a clean and durable finish. Take care to sew just outside the edges of the holes, ensuring that the rings will slide smoothly through the openings.
Once all the curtain ring holes are sewn, your homemade shower curtain is nearly complete. Take a moment to admire your handiwork and make any necessary adjustments before proceeding to the final steps.
Finalizing the Project
With the sewing complete, it’s time to finalize your homemade shower curtain. The final steps involve inspecting the finished product, ironing the curtain for a polished appearance, inserting the curtain rings, and attaching the liner if needed.
Inspecting the finished product
Before hanging your shower curtain, take a few moments to inspect the finished product. Look for any loose threads, uneven stitching, or other imperfections that may have occurred during the sewing process. Trim any loose threads with fabric scissors and make any necessary repairs or adjustments.
By thoroughly inspecting your shower curtain, you can ensure that it meets your expectations and is ready for use in your bathroom. Don’t be afraid to take the time to perfect any small details before moving forward.
Ironing the shower curtain
Ironing your shower curtain is an essential step to achieve a polished and professional look. Set up an ironing board in your sewing area and adjust the iron to the appropriate temperature for your fabric.
Starting with the top hem, place the curtain on the ironing board with the wrong side facing up. Carefully press the fabric, applying even pressure with the iron. Continue ironing the entire curtain, focusing on each seam, hem, and design feature.
Ironing will smooth out any wrinkles or creases, allowing the curtain to hang beautifully and enhancing the overall appearance of your bathroom. Take your time and be mindful of the fabric’s heat tolerance to avoid any damage or distortion.
Inserting the curtain rings
With your shower curtain ironed and ready, it’s time to insert the curtain rings. Depending on the type of rings you have selected, this step may vary slightly.
Start by opening each curtain ring and sliding it through one of the curtain ring holes. Ensure that the rings are evenly spaced along the top edge of the curtain, providing adequate support and allowing for smooth movement when opening and closing.
Take a moment to adjust the position of each ring, ensuring that it hangs evenly and does not bunch or sag at any point. Once the rings are properly aligned, close them securely to hold the curtain in place.
Attaching the liner, if needed
If you have chosen to use a shower curtain liner, it’s time to attach it to your homemade shower curtain. The liner provides an additional layer of protection against water and ensures that your fabric curtain remains dry and clean.
Insert the liner between the curtain and the shower area, aligning the top edges. Use small plastic or metal hooks to attach the liner to the curtain, ensuring that it hangs smoothly and securely.
When attaching the liner, make sure it is slightly shorter than the fabric curtain to prevent it from peeking out from beneath. The liner should serve as a hidden layer that complements and protects your beautiful homemade shower curtain.

Maintaining Your Handmade Shower Curtain
Now that your homemade shower curtain is hanging beautifully in your bathroom, it’s important to know how to properly care for and maintain it. With the right cleaning and maintenance routine, you can ensure that your shower curtain remains in excellent condition for years to come.
Handling regular cleaning and maintenance
Regular cleaning and maintenance are key to keeping your handmade shower curtain looking fresh and vibrant. The specific cleaning instructions will depend on the chosen fabric and any additional design elements.
For most fabric shower curtains, machine washing on a gentle cycle with mild detergent is recommended. Check the fabric care instructions and follow any specific guidelines provided. Be sure to remove the curtain rings before washing to prevent any damage to the fabric or the machine.
If your shower curtain features special design elements like ruffles or trim, consider hand washing or spot cleaning those areas to avoid any damage. Additionally, regularly inspect the curtain for any signs of mold or mildew and address them promptly with appropriate cleaning solutions.
Making repairs as needed
Over time, your shower curtain may require minor repairs due to wear and tear. Loose threads, frayed edges, or small holes can be easily fixed with basic sewing skills.
Inspect your shower curtain regularly and address any issues as soon as you notice them. Trim loose threads with fabric scissors and carefully sew up any small holes or tears. Taking care of these small repairs will ensure that your curtain remains in excellent condition and can continue to be enjoyed.
Replacing parts like rings and liners, if required
As with any bathroom accessory, parts like curtain rings and liners may need to be replaced over time. Metal rings may rust or lose their functionality, while liners can develop mold or discoloration with frequent use.
Regularly inspect these parts and replace them as needed. Ensure that the curtain rings are secure and slide smoothly along the rod. If the liner shows signs of wear or fails to provide adequate water protection, consider replacing it promptly to maintain the integrity of your homemade shower curtain.
Conclusion
Crafting a unique shower curtain offers numerous benefits and allows you to unleash your creativity in your bathroom decor. By considering the desired look and feel, choosing the right materials, and sourcing the necessary equipment, you can embark on a fulfilling DIY project.
Creating a design plan, measuring the materials accurately, and implementing proper cutting and sewing techniques are crucial steps in the process. By paying attention to the details, you can produce a homemade shower curtain that fits perfectly in your bathroom and reflects your personal style.
Remember to maintain your handmade shower curtain properly, handling regular cleaning and maintenance, making repairs as needed, and replacing worn-out parts. With proper care, your homemade shower curtain will continue to enhance your bathroom’s aesthetics for years to come.
As you enjoy the benefits of your handmade bathroom accent, it’s time to look forward to future sewing projects. Embrace the joys of DIY and continue to explore your creative side, as there is no limit to what you can create in your home. Have fun, experiment, and let your imagination run wild with endless possibilities. Happy sewing!